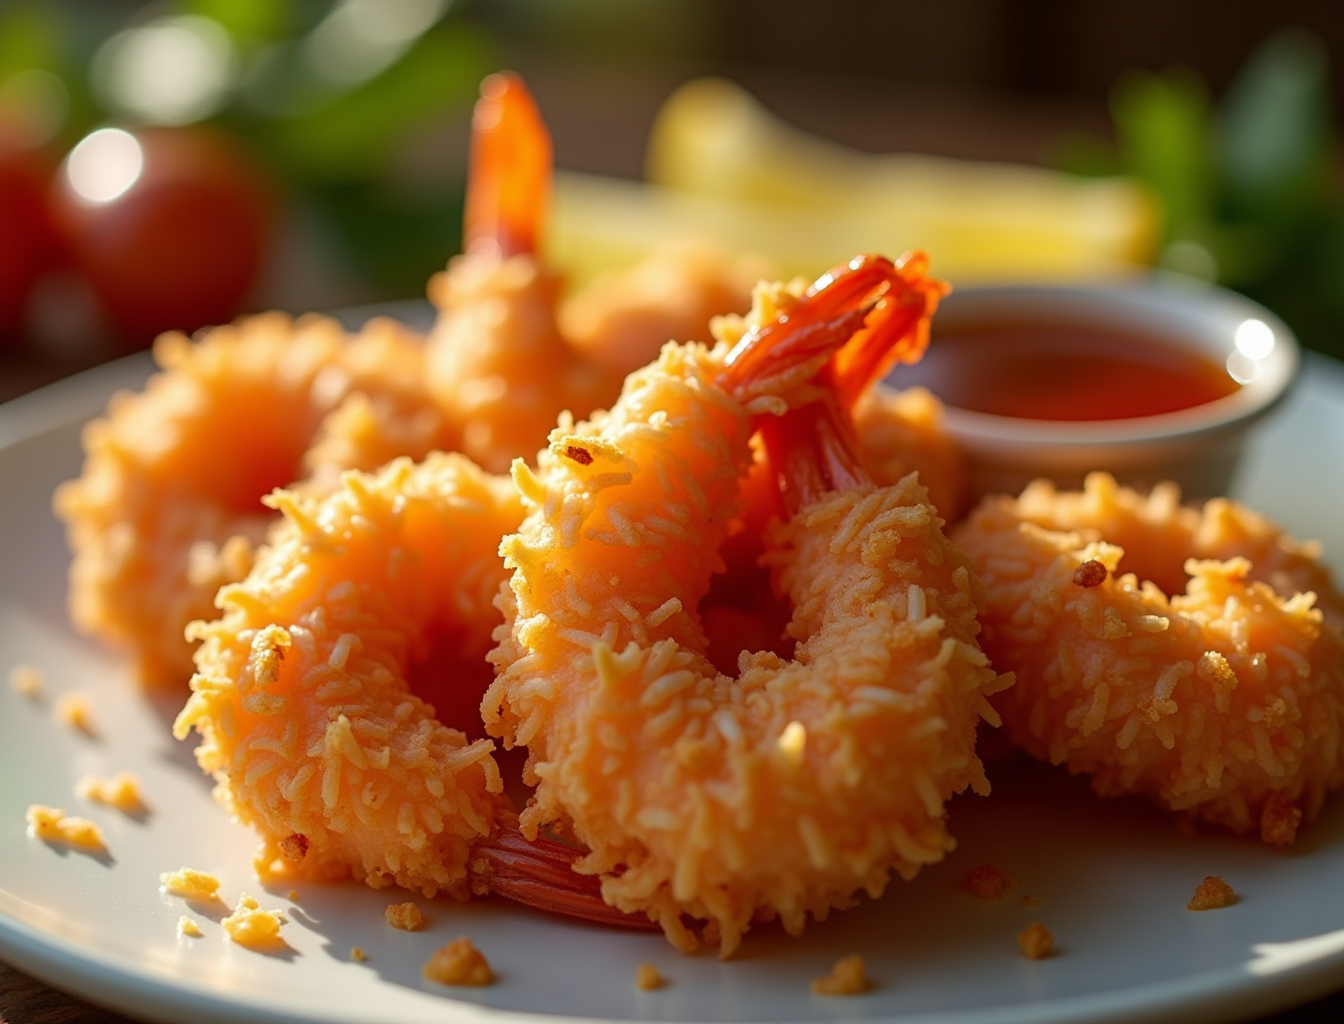
Air Fryer Coconut Shrimp (Crispy, Golden — Restaurant Copycat at Home)
The coconut shrimp at Outback Steakhouse and Red Lobster is deep-fried in oil heated to 350°F. By the time it reaches your table it has absorbed a significant amount of that oil — the crunch you love is partly a crunch of saturated fat. The air fryer version achieves the same golden-brown coconut crust and juicy shrimp interior through circulating hot air rather than oil immersion, cutting the calories roughly in half without touching the flavor profile that makes the dish so satisfying.
PrintAir Fryer Coconut Shrimp
Crispy, golden coconut shrimp made in the air fryer using a three-component coating of seasoned flour, egg wash, and a 50/50 sweetened coconut and panko mixture. Served with a sweet chili dipping sauce, it delivers restaurant-quality results at roughly half the calories of the deep-fried version.
- Prep Time: 15 minutes
- Cook Time: 10 minutes
- Total Time: 25 minutes
- Yield: 4 servings 1x
- Category: Appetizer
- Method: Air Fryer
- Cuisine: American
Ingredients
- Shrimp:
- 1 lb large shrimp (21/25 count), peeled, deveined, tails-on
- Flour Layer:
- 1/2 cup all-purpose flour
- 1/2 tsp garlic powder
- 1/4 tsp salt
- 1/4 tsp cayenne pepper
- Egg Wash:
- 2 large eggs
- 2 tbsp water or coconut milk
- Coconut Coating:
- 3/4 cup sweetened shredded coconut
- 3/4 cup panko breadcrumbs
- 1/4 tsp salt
- For Cooking:
- Neutral oil spray (avocado or coconut oil spray)
- Sweet Chili Dipping Sauce:
- 1/4 cup sweet chili sauce
- 2 tbsp apricot jam
- 1 tsp fresh lime juice
- Pinch of red pepper flakes
Instructions
- Pat every shrimp completely dry with paper towels on all sides. Any moisture on the shrimp prevents the flour from adhering and causes the coating to slide off.
- If butterflying, use a paring knife to slice 3/4 of the way through the back of each shrimp lengthwise. Press gently to open and flatten.
- Set up three shallow bowls: one with the seasoned flour, one with the beaten eggs and water or coconut milk, and one with the combined coconut and panko mixture.
- Dredge each shrimp in the flour, shaking off the excess. Dip in the egg wash and let excess drip off. Press firmly into the coconut-panko mixture to coat all sides.
- Arrange coated shrimp in a single layer in the air fryer basket. Spray lightly with oil spray. Air fry at 400°F for 8–10 minutes, flipping once halfway through, until the coating is golden brown and the shrimp are cooked through.
- While the shrimp cook, stir together the sweet chili sauce, apricot jam, lime juice, and red pepper flakes. Serve shrimp immediately with the dipping sauce.
Notes
Use large (21/25 count) or jumbo (16/20 count) shrimp — smaller shrimp get overwhelmed by the coating and are difficult to dredge evenly.
The 50/50 coconut-to-panko ratio is critical. All-coconut coatings lack structural rigidity and shed in the basket; all-panko loses the coconut flavor.
For maximum coating adhesion, refrigerate the coated shrimp on a wire rack for 15–30 minutes before air frying. The cold rest firms up the egg wash and helps the coating grip.
Cook shrimp to an internal temperature of 145°F per USDA FSIS guidelines.
The key is the coating system. Most coconut shrimp failures happen because people skip one of the three components — the flour layer, the egg wash, or the specific coconut-panko ratio — and the coating falls off in sheets in the air fryer basket. This guide covers all three components and the one refrigeration trick that makes coating adhesion nearly foolproof.
Why Does Air Fryer Coconut Shrimp Beat the Deep-Fried Version?
The Oil Problem at Restaurants
Restaurant coconut shrimp at Outback contains approximately 530–600 calories per appetizer serving (around 6 shrimp). A significant portion of those calories comes from oil absorption during deep frying — coconut and panko are porous coatings that soak up frying oil readily. The shrimp themselves are small and cook fast, but the coating continues absorbing oil the entire time it is submerged.
What the Air Fryer Achieves
The same recipe made in the air fryer with a light oil spray produces approximately 280–320 calories per serving. The coconut coating toasts to the same golden-brown color through the Maillard reaction driven by dry heat rather than oil. The shrimp interior stays juicy because the circulating air cooks them quickly without waterlogging them in oil. The texture difference between air-fried and deep-fried coconut shrimp is real — the deep-fried version has a slightly crispier, greasier outer layer — but most people cannot identify which is which in a blind taste test.
Calorie Comparison
| Method | Calories (per serving, ~6 shrimp) | Fat |
|---|---|---|
| Outback Steakhouse (restaurant deep-fried) | ~560 | ~32g |
| Home deep-fried | ~420 | ~24g |
| Air fryer (this recipe) | ~280 | ~10g |
What Kind of Shrimp Should You Use for Coconut Shrimp?
Size Matters: Large or Jumbo Work Best
Large shrimp (21/25 count — meaning 21 to 25 per pound) and jumbo shrimp (16/20 count) are the correct sizes for coconut shrimp. The shrimp needs to be substantial enough that after coating, the ratio of shrimp meat to coating is favorable — you want to taste the shrimp, not just the coconut. Smaller shrimp (31/40 and above) get overwhelmed by the coating and are difficult to dredge efficiently.
The count number is printed on every bag of frozen shrimp. The lower the count number, the larger the shrimp. When in doubt, buy the bag labeled “large” or “jumbo.”
Fresh vs. Frozen
Frozen shrimp is often the better choice, and for coconut shrimp specifically, the moisture control argument makes it even stronger. “Fresh” shrimp at most grocery stores has been previously frozen and thawed — it is neither fresher nor better than IQF (individually quick frozen) shrimp from a reliable brand. Frozen shrimp thawed properly is clean, firm, and consistently sized, which makes uniform coating much easier than working with shrimp in various stages of thaw from a seafood counter.
Shell-On vs. Peeled and Deveined
Buy peeled and deveined, tails-on. Leaving the tails on gives diners a natural handle for dipping, and it looks better on the plate. Peeling and deveining raw shrimp yourself is a chore that produces no flavor benefit — buy pre-done.
Butterflying the Shrimp for Better Coating Hold
Butterflying — slicing 3/4 of the way through the back of the shrimp lengthwise — creates a flat, wide surface that holds significantly more coating and opens up to a larger finished piece. It is not strictly required but adds about 20% more coating coverage and a more impressive visual presentation. Use a sharp paring knife and make a gentle cut through the back of the shrimp without cutting all the way through.
What Is the Three-Component Coating System for Coconut Shrimp?
This is the most important technique section in this article. Every coating failure traces back to skipping one of these three components or getting their proportions wrong.
Component 1 — Flour (The Adhesion Layer)
The flour coating sticks directly to the shrimp’s surface and creates a dry, rough texture that the egg wash can grab onto. Without flour, the egg wash slides off the smooth shrimp surface and the coconut coating follows. All-purpose flour works. Season it with garlic powder, salt, and cayenne so the layer itself contributes flavor. Shake off excess after dredging — too much flour makes the coating thick and pasty.
Component 2 — Egg Wash (The Glue)
The egg wash is the bridge between the flour and the coconut-panko coating. It provides a wet, protein-rich surface that the dry coating adheres to firmly. Two eggs beaten with 2 tbsp water or (better) 2 tbsp coconut milk creates a wash with enough body to coat evenly. Let excess drip off before pressing into the coating — too thick an egg layer makes the coating soggy before cooking begins.
Component 3 — Coconut + Panko Mixture (The Crunch)
The ratio is 50% shredded coconut, 50% panko breadcrumbs. This is the ratio most recipes get wrong. 100% coconut without panko produces a coating that does not have enough structural rigidity — it is too light and fluffy, and it sheds in the air fryer basket. 100% panko is just breaded shrimp without the coconut flavor. The 50/50 combination gives you genuine coconut flavor and aroma with the structural integrity of breadcrumbs to produce a crust that stays on through cooking.
Ingredients for Air Fryer Coconut Shrimp
Prep time: 15 minutes | Cook time: 10 minutes | Total time: 25 minutes | Serves: 4 (~5–6 shrimp each)
Shrimp
- 1 lb large shrimp (21/25 count), peeled, deveined, tails-on
Flour Layer
- 1/2 cup all-purpose flour
- 1/2 tsp garlic powder
- 1/4 tsp salt
- 1/4 tsp cayenne pepper
Egg Wash
- 2 large eggs
- 2 tbsp water or coconut milk
Coconut Coating
- 3/4 cup sweetened shredded coconut
- 3/4 cup panko breadcrumbs
- 1/4 tsp salt
For Cooking
- Neutral oil spray (avocado or coconut oil spray)
Sweet Chili Dipping Sauce
- 1/4 cup sweet chili sauce
- 2 tbsp apricot jam
- 1 tsp fresh lime juice
- Pinch of red pepper flakes
How to Make Air Fryer Coconut Shrimp Step-by-Step
- Dry the shrimp completely. Pat every shrimp with paper towels — top, bottom, and sides. Any moisture on the shrimp prevents the flour from adhering and causes the coating to slide off. This is the most important prep step.
- Butterfly if desired: Use a paring knife to slice 3/4 of the way through the back of each shrimp. Press gently to open and flatten.
- Set up the dredging station: Three shallow bowls in sequence — (1) flour + garlic powder + salt + cayenne; (2) eggs + water, beaten; (3) coconut + panko + salt combined.
- Dredge in flour: Hold the shrimp by the tail, dredge in the flour mixture, then shake gently to remove excess. Only a thin flour coating should remain.
- Dip in egg wash: Dip the floured shrimp in the egg wash, let excess drip off for 2–3 seconds.
- Press into coconut coating: Lower the shrimp into the coconut-panko mixture. Press firmly and hold for 5 full seconds — this is the press-and-hold technique. Apply coconut to the sides and top. The pressure helps the coating adhere rather than just resting loosely on the surface.
- Refrigerate coated shrimp for 10 minutes. Place them on a wire rack and refrigerate. This sets the coating and reduces shedding in the air fryer dramatically.
- Preheat air fryer to 375°F for 3 minutes. Spray the basket with oil.
- Arrange shrimp in a single layer with tails curled upward. Do not let them touch. Spray tops of coated shrimp with oil spray.
- Air fry at 375°F for 8–10 minutes, flipping at 5 minutes. Large shrimp (21/25) typically need 8–9 minutes; jumbo shrimp (16/20) may need the full 10 minutes.
- Check internal temperature: Per FDA seafood safety guidelines and confirmed by USDA FSIS, shrimp should reach an internal temperature of 145°F. Visual cue: the shrimp flesh inside the coating is opaque pink throughout with no gray translucent areas.
- Serve immediately with sweet chili dipping sauce.
Air Fryer Coconut Shrimp Time and Temperature Chart
| Shrimp Type | Temperature | Time | Flip? | Notes |
|---|---|---|---|---|
| Large (21/25), homemade coating | 375°F | 8–9 min | Yes, at 5 min | Standard recipe timing |
| Jumbo (16/20), homemade coating | 375°F | 9–10 min | Yes, at 5 min | Larger size, slightly more time |
| Frozen (SeaPak, Outback, Trader Joe’s) | 375°F | 10–12 min | Yes, at 6 min | No thawing; no oil spray needed |
| 100% coconut (no panko) | 360°F | 7–9 min | Yes, at 4 min | Lower temp prevents burning |
| Unsweetened coconut + panko | 360°F | 7–8 min | Yes, at 4 min | Unsweetened browns faster; watch closely |
All times assume preheated basket-style air fryer. Add 2 minutes for oven-style air fryers. See our Air Fryer Cooking Times Chart for complete seafood timing reference.
What Is the Pressing Step That Makes Coconut Stick?
Why Coconut Falls Off in the Air Fryer
The air fryer’s powerful fan is exactly what crisps the coating — but it is also what blows loosely attached coconut off the shrimp in the first 2 minutes of cooking. If you simply dip the shrimp in coconut and panko without pressing, the coating sits loosely on the egg surface and the fan dislodges it immediately. Loose coconut accumulates in the basket, burns, and creates smoke.
Press and Hold — The Technique
After lowering the egg-coated shrimp into the coconut-panko bowl, place the fingertips of both hands over the shrimp and press firmly for a full 5 seconds. The goal is to compress the coating into the egg wash layer so that when you lift the shrimp, the coating is mechanically interlocked with the egg surface rather than just resting on top of it. Roll to coat the sides and press again. When you lift the shrimp and look at it, the coconut should not flake off when you tap it lightly.
Refrigerating Before Cooking
After pressing the coating onto each shrimp, place them on a wire rack and refrigerate for 10 minutes. The cold temperature firms up the egg wash, which locks the coating in place. This step reduces coating loss in the air fryer by approximately 70% compared to cooking immediately after coating. If you are coating shrimp for a party, you can do this step up to 1 hour ahead.
What Are the Pro Tips for Extra Crispy Coconut Shrimp?
Sweetened vs. Unsweetened Coconut
Sweetened shredded coconut is traditional for coconut shrimp and produces the classic golden-brown crust with a slightly sweet flavor. The sugar in sweetened coconut caramelizes during cooking, contributing to the color and flavor. Unsweetened coconut works but browns faster and can turn bitter at the edges if overcooked. If using unsweetened, reduce the air fryer temperature to 360°F and check at 7 minutes.
Toast the Coconut Before Coating for Deeper Flavor
This is the pro technique: toast the shredded coconut in a dry pan over medium heat for 2–3 minutes, stirring constantly, until lightly golden and fragrant before mixing it with the panko. Pre-toasting intensifies the coconut aroma significantly and gives you more control over the color (since you can ensure it is golden before it goes on the shrimp). The finished coconut shrimp has noticeably deeper coconut flavor. Allow toasted coconut to cool completely before mixing with panko.
Flip at 5 Minutes for Even Browning
Unlike many air fryer foods that do not require flipping, coconut shrimp benefits from a single flip at the halfway point. The bottom gets more direct heat from the basket, and the top tends to brown less evenly without a flip. Turn with tongs gently — grab the tail, not the coated body — and spray the newly exposed bottom with a light mist of oil before returning to the air fryer.
What Are the Best Dipping Sauces for Coconut Shrimp?
Sweet Chili Sauce (The Classic)
Mix 1/4 cup store-bought sweet chili sauce with 2 tbsp apricot jam, 1 tsp lime juice, and a pinch of red pepper flakes. The apricot jam adds body and a tropical sweetness that complements the coconut coating. This is as close to the Outback Steakhouse version as a homemade sauce gets.
Pineapple Apricot Dipping Sauce (Full Outback Copycat)
Blend 1/4 cup apricot preserves + 1/4 cup pineapple juice + 1 tbsp Dijon mustard + 1 tsp horseradish + pinch of salt until smooth. The horseradish and mustard add a sharpness that prevents the sauce from being one-dimensionally sweet. This is the sauce you remember from the restaurant — the specific combination of stone fruit sweetness and mustard heat is what makes it distinctive.
Spicy Mango Sauce
Blend 1 mango (peeled and diced) + 1 tbsp lime juice + 1 tbsp rice vinegar + 1 jalapeño (seeded) + 1 tbsp honey + salt until smooth. Fresh mango sauce is fragrant and bright against the toasted coconut. Serve this version when you want the shrimp to feel tropical and fresh rather than rich.
What Are the Best Variations for Air Fryer Coconut Shrimp?
Spicy Coconut Shrimp (Sriracha in the Egg Wash)
Add 1 tbsp sriracha to the egg wash before whisking. The sriracha permeates the coating during pressing and cooking, creating a mild-to-moderate heat that contrasts beautifully with the sweet coconut. The heat is subtle in the finished shrimp — noticeable but not overwhelming. Serve with the pineapple apricot sauce rather than sweet chili to balance the heat.
Lime-Coconut Shrimp
Add the zest of 2 limes to the coconut-panko coating mixture before dredging. The lime zest gives the coating a bright, citrusy note that lifts the coconut flavor. Serve with lime wedges and a sour cream-lime dipping sauce (1/2 cup sour cream + 2 tbsp lime juice + 1 tsp lime zest + salt). This variation has a lighter, more tropical feel than the classic sweet chili version.
Coconut Shrimp Tacos
Serve 3–4 coconut shrimp in small flour tortillas (warmed in the air fryer for 30 seconds). Add shredded purple cabbage, a spoonful of mango salsa, and a drizzle of sriracha mayo (1/4 cup mayo + 1 tbsp sriracha). The taco format takes what is normally an appetizer and turns it into a full meal that feeds a crowd.
How to Cook Frozen Coconut Shrimp in the Air Fryer
Frozen coconut shrimp (SeaPak, Outback brand, Trader Joe’s, and most grocery store varieties) cook excellently in the air fryer, often better than in the oven.
Method: Cook straight from frozen at 375°F for 10–12 minutes, flipping at the 6-minute mark. No oil spray needed — the manufacturers’ coating already contains oil. No thawing needed — cook from frozen for the best texture.
Different brands vary in size, so start checking at 10 minutes. The shrimp is done when the coconut coating is golden-brown and the internal temperature of the shrimp reaches 145°F. If the coating is browning faster than expected, reduce to 360°F for the remaining time.
How Do You Store, Make Ahead, and Reheat Air Fryer Coconut Shrimp?
Refrigerator: Cooked coconut shrimp keep for 2 days. The coating softens overnight — this is expected and unavoidable as the moisture from the shrimp migrates into the coating. The flavor remains good.
Reheat: Air fry at 375°F for 4–5 minutes. The air fryer re-crisps the coconut coating better than any other reheating method — significantly better than the oven and incomparably better than the microwave, which destroys the coating completely. Check that the internal temperature reaches 145°F when reheating.
Make-ahead (coated, uncooked): After coating and pressing, place on a wire rack and refrigerate up to 1 hour before cooking. Beyond 1 hour, the egg wash and coconut interact and the coating can become gummy.
Freeze uncooked coated shrimp: Arrange coated shrimp on a parchment-lined baking sheet in a single layer and freeze until solid. Transfer to a freezer bag and freeze up to 1 month. Cook from frozen at 370°F for 11–13 minutes, flipping at 6 minutes. This is the best make-ahead method for entertaining — coat a large batch, freeze, and cook directly from the freezer the day of the party.
Do not microwave: The microwave creates steam that collapses the coconut coating into a soft, gummy layer. The shrimp texture becomes mealy. The air fryer is the only reheating method that restores crispness.
Frequently Asked Questions
How do you keep coconut from falling off shrimp in the air fryer?
Four steps prevent coconut coating loss: (1) pat shrimp completely dry before coating — surface moisture causes the flour layer to not adhere, which cascades into coating failure; (2) press the coconut-panko mixture firmly against the shrimp and hold for a full 5 seconds — passive dipping is not enough; (3) refrigerate coated shrimp for 10 minutes before air frying to firm up the egg wash bond; (4) always mix panko with the coconut — pure coconut coating lacks structural rigidity and the fan will blow it off. The 50/50 ratio is essential.
How long do you cook coconut shrimp in the air fryer?
Fresh homemade coconut shrimp cooks at 375°F for 8–10 minutes, flipping once at 5 minutes. Large shrimp (21/25 count) are typically done at 8–9 minutes; jumbo shrimp (16/20) may need the full 10 minutes. Verify the internal temperature reaches 145°F for food safety. Frozen store-bought coconut shrimp takes 10–12 minutes from frozen without thawing — no adjustment needed.
Should you use sweetened or unsweetened coconut for coconut shrimp?
Sweetened shredded coconut is traditional and produces the classic golden-brown crust with the slightly sweet flavor that makes the dish recognizable. Unsweetened coconut works but toasts faster and can develop a slightly bitter, burned edge if the air fryer runs hot. If using unsweetened coconut, reduce the temperature to 360°F and check at 7 minutes. Either works — the sweetened version is more forgiving for first-time attempts.
What is the best dipping sauce for coconut shrimp?
Sweet chili sauce is the most universally popular choice and pairs with the coconut sweetness effortlessly. The Outback-style pineapple apricot sauce — apricot preserves, pineapple juice, Dijon, and horseradish — is the most restaurant-accurate option. Mango salsa or spicy mango sauce works well for a fresher, more tropical profile. All three recipes are in the Dipping Sauce section above.
Can I use medium shrimp (31/40) for coconut shrimp?
Medium shrimp are too small for coconut shrimp — the coating overwhelms the shrimp, making each piece mostly coating with a tiny bit of shrimp in the middle. The 21/25 large size is the minimum for coconut shrimp. The shrimp needs to be substantial enough that after coating, the meat-to-coating ratio is at least 60/40. Jumbo (16/20) shrimp is the best choice if you want a dramatic, restaurant-style presentation.
Can I make air fryer coconut shrimp gluten-free?
Yes. Replace the all-purpose flour with rice flour or tapioca starch (both create excellent crispy coatings) and replace the panko with gluten-free panko breadcrumbs. The coconut is naturally gluten-free. The technique and timing remain identical. Rice flour actually produces a slightly crispier result than all-purpose flour and is worth trying even if you are not avoiding gluten.
Related Recipes
- Air Fryer Cooking Times Chart — Complete Guide (100+ Foods)
- Air Fryer Shrimp — Perfectly Cooked Every Time
- Air Fryer Salmon — Crispy Skin, Tender Center
- Air Fryer Fish — The Complete Guide