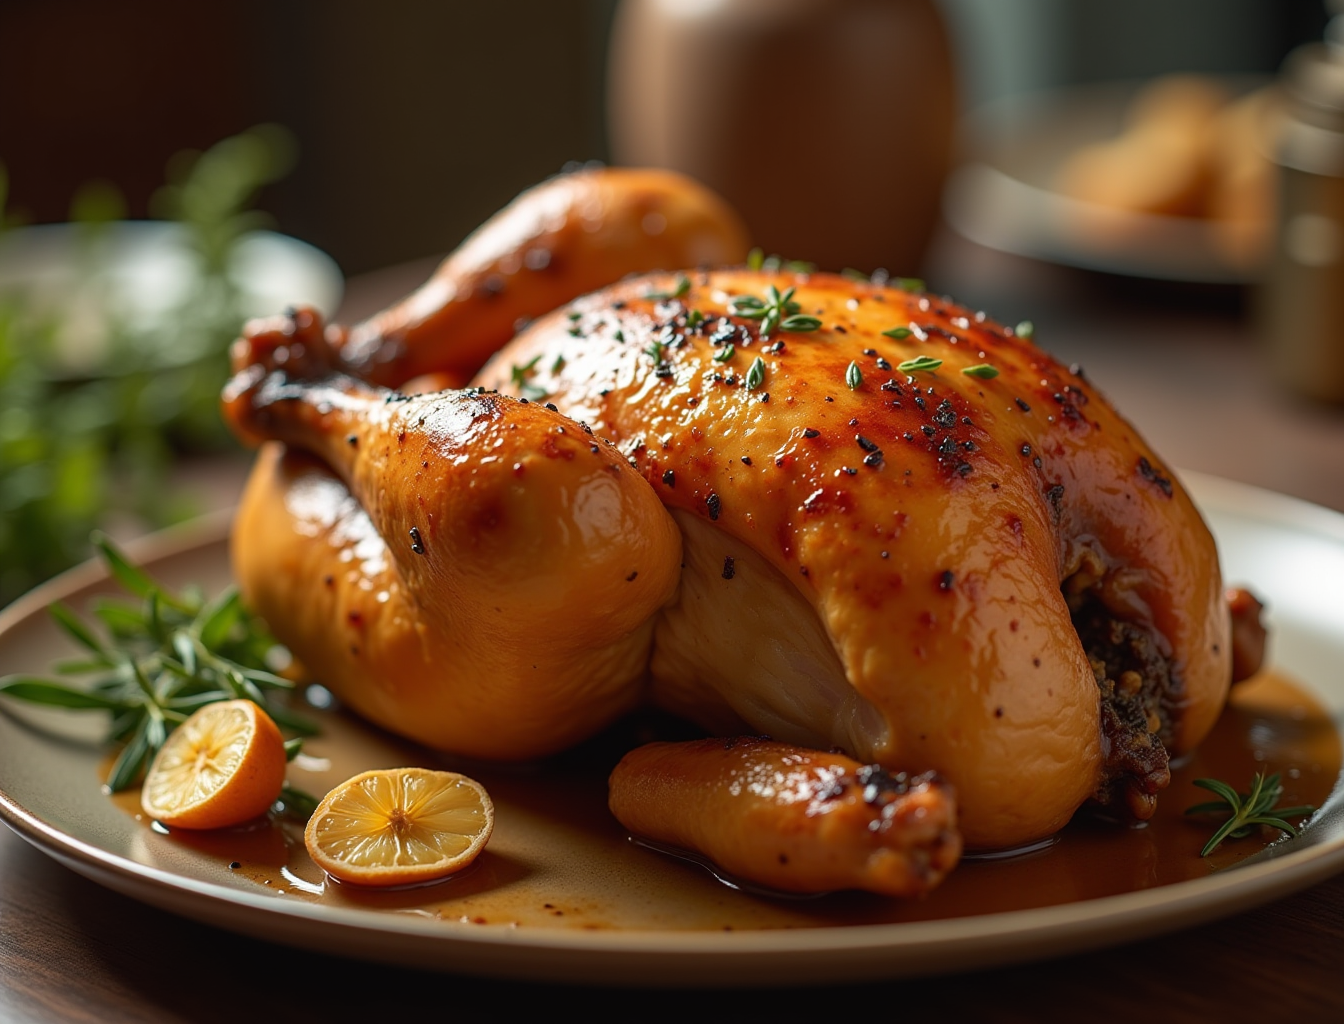
Air Fryer Whole Chicken (Crispy Skin, Juicy Meat — Every Time)
A whole roast chicken in 70 minutes, with crispier skin than your oven produces in 90. That is what the air fryer delivers — and the results are not a consolation prize for the oven-free cook. They are genuinely better. The circulating heat renders the skin to a deep golden crackle while the breast meat stays moist, and you get there 20–30 minutes faster than traditional roasting.
PrintAir Fryer Whole Chicken
A whole chicken cooked in the air fryer using a two-phase method — breast side down first, then flipped and finished at higher heat — for crispier skin and juicier meat than traditional oven roasting.
- Prep Time: 10 minutes
- Cook Time: 1 hour 10 minutes
- Total Time: 1 hour 20 minutes
- Yield: 4 servings 1x
- Category: Dinner
- Method: Air Fryer
- Cuisine: American
Ingredients
- 1 whole chicken, 3.5–4.5 lbs (must fit in your basket)
- 2 tablespoons olive oil or melted butter
- 1 teaspoon kosher salt
- 1 teaspoon smoked paprika
- 1 teaspoon garlic powder
- 1/2 teaspoon onion powder
- 1/2 teaspoon black pepper
- Optional: fresh thyme, lemon zest, cayenne pepper
Instructions
- Remove the chicken from packaging and pat completely dry inside and out with paper towels, including the cavity and any tucked wing areas. Any surface moisture creates steam that softens the skin.
- Mix all dry seasoning ingredients together. Slide fingers under the breast skin and apply dry rub directly onto the meat, then coat all exterior surfaces generously. Brush olive oil or melted butter over the entire exterior to help the rub adhere.
- Preheat the air fryer to 360°F for 5 minutes before adding the chicken.
- Place the chicken breast side down in the air fryer basket. Cook at 360°F for 30 minutes.
- Using tongs and a spatula, carefully flip the chicken breast side up. Increase the temperature to 380°F and cook for an additional 35 minutes (adjust based on weight; see cook time chart).
- Insert an instant-read thermometer into the thickest part of the thigh, not touching the bone — the chicken is done at 165°F. Remove from the basket and rest on a cutting board for 10 minutes before carving.
Notes
For dramatically crispier skin, after patting dry place the chicken uncovered on a rack over a sheet pan and refrigerate for 1–4 hours (or overnight) before cooking.
Air fryer models vary significantly in heat output — always use an instant-read thermometer to verify doneness rather than relying on cook time alone.
You need at least a 5.8-quart air fryer for a 3.5–4 lb bird. For a 5 lb or larger chicken, use a 6–8 qt model or oven-style air fryer.
The technique that makes this work is the two-phase method: breast side down first, then flipped and finished at higher heat. Here is the complete guide, with a weight-based cook time chart for every size bird you are likely to cook.
Why Does the Air Fryer Make Better Roast Chicken Than the Oven?
Crispier Skin Than the Oven
The air fryer generates convection heat that moves at higher velocity than a standard oven — the fan circulates hot air forcefully and directly around the bird. This aggressive air movement does two things for the skin: it evaporates moisture from the surface rapidly (moisture is the enemy of crispy skin) and it delivers continuous heat contact that crisps the fat layer under the skin. A standard oven at 425°F produces good skin. A 380°F air fryer produces better skin. The physics are in your favor.
Faster Than Traditional Roasting
A 4-lb chicken in a conventional oven at 425°F typically requires 60–75 minutes plus preheat time. The same chicken in a preheated air fryer at 360°F takes 60–70 minutes total — about the same cook time, but you reclaim the 15–20 minutes of oven preheat. For larger birds (4.5 lbs), the air fryer finishes 20–25 minutes faster than an oven at equivalent temperature.
Juicier Results from Circulating Heat
The convection movement cooks more evenly than a conventional oven, which tends to run hotter near the heating elements and cooler in the center. Even heat distribution means the breast meat does not overcook while the thighs are still finishing — the most common failure mode of oven-roasted chicken. Start breast-side down to add another layer of protection for the white meat (more on this below).
What You Need
Equipment: Air Fryer Size Requirements
You need at least a 5.8-quart air fryer to fit a 3.5–4 lb whole chicken. A 5-qt basket is borderline — the chicken fits, but clearance from the heating element above is minimal, which can cause uneven top browning. The sweet spot is 5.8–6 qt for birds up to 4.5 lbs.
For a 5-lb or larger bird, you need a 6–8 qt model or an oven-style air fryer. Most standard basket-style fryers max out at 4.5 lbs. When in doubt: measure the interior basket width and compare it to the chicken’s width at the breast — you need at least 1 inch of clearance on each side for proper airflow. See our Best Air Fryer for Families guide for models with the largest capacities.
Ingredients
- 1 whole chicken, 3.5–4.5 lbs (must fit in your basket)
- 2 tablespoons olive oil or melted butter
- 1 teaspoon kosher salt
- 1 teaspoon smoked paprika
- 1 teaspoon garlic powder
- 1/2 teaspoon onion powder
- 1/2 teaspoon black pepper
- Optional: fresh thyme, lemon zest, cayenne pepper
Air Fryer Whole Chicken — Full Recipe
Step 1: Pat the Chicken Completely Dry
Remove the chicken from its packaging and pat completely dry inside and out with paper towels. This is the most important step in this entire recipe. Any surface moisture creates steam in the hot air fryer, and steam is the opposite of what you want — it softens the skin rather than crisping it. Dry thoroughly, including the cavity and any tucked wing areas.
Optional: after drying, place the chicken on a rack over a sheet pan and refrigerate uncovered for 1–4 hours (or overnight). This desiccates the skin further and results in dramatically crisper results. If you have time, do this step.
Step 2: Apply the Dry Rub
Mix all dry seasoning ingredients together. Coat the chicken generously on all surfaces — and critically, slide your fingers under the breast skin and apply dry rub directly onto the meat under the skin. The rub under the skin flavors the meat directly and prevents the seasoning on the surface from washing off when skin fat renders during cooking.
Brush or rub olive oil or melted butter over the entire exterior to help the dry rub adhere and promote browning.
Step 3: Preheat the Air Fryer
Preheat the air fryer to 360°F for 5 minutes. Do not skip this step — adding a cold chicken to a cold basket prevents the surface crust from forming immediately and results in less crispy skin.
Step 4: Cook Breast Side Down First
Place the chicken breast side down in the air fryer basket. This orientation is deliberate and important: it insulates the white meat from the direct radiant heat below, preventing the breast from overcooking during the first half of the cook while the thighs (which need more time) catch up. The dark meat — thighs and legs — faces the bottom heating element and cooks faster.
Cook at 360°F for 30 minutes.
Step 5: Flip and Finish at Higher Heat
Using tongs and a spatula, carefully flip the chicken breast side up. Increase the temperature to 380°F. Cook for an additional 25–35 minutes, depending on the bird’s weight (see the cook time chart below).
The increased temperature in the second phase crisps the breast skin and finishes the surface browning. At 380°F, the breast skin should turn deep golden in 20–25 minutes.
Step 6: Verify Temperature and Rest
Insert an instant-read thermometer into the thickest part of the thigh, not touching the bone. Per USDA food safety guidelines, poultry is safe to eat at an internal temperature of 165°F as measured in the innermost part of the thigh, wing, and thickest part of the breast. (USDA FSIS Safe Temperature Chart)
Do not rely on cook time alone — air fryer models vary significantly in actual heat output, and the same recipe will run 5–10 minutes different between a Ninja and a Cosori. The thermometer is the only reliable doneness indicator.
Once the thermometer reads 165°F, remove the chicken from the basket and rest on a cutting board for 10 minutes before carving. This allows the juices to redistribute through the meat. Carving immediately causes them to run out onto the board, leaving drier breast meat.
Air Fryer Whole Chicken Cook Time Chart (by Weight)
| Chicken Weight | Phase 1 (Breast Down) | Phase 2 (Breast Up) | Total Time | Rest Time | Safe Temp Target |
|---|---|---|---|---|---|
| 3 lbs | 360°F, 25 min | 380°F, 22–27 min | 47–52 min | 10 min | 165°F (thigh) |
| 3.5 lbs | 360°F, 28 min | 380°F, 25–30 min | 53–58 min | 10 min | 165°F (thigh) |
| 4 lbs | 360°F, 30 min | 380°F, 28–35 min | 58–65 min | 10 min | 165°F (thigh) |
| 4.5 lbs | 360°F, 30 min | 380°F, 35–42 min | 65–72 min | 10 min | 165°F (thigh) |
Times are estimates. Always verify with an instant-read thermometer — models vary. USDA safe minimum internal temperature for all poultry: 165°F.
Pro Tips for Perfect Results
Pat Dry Is Non-Negotiable
The single biggest determinant of skin quality is surface moisture. Pat every square inch of the chicken dry before applying the rub. If you have extra time, the uncovered refrigerator rest of 1–4 hours produces noticeably better skin than cooking immediately after drying.
Breast Side Down First for Juicier White Meat
This technique directly addresses the most common complaint about roast chicken: dry breast meat. Starting breast-side down positions the leanest, most moisture-sensitive part of the bird away from the strongest heat source during the first half of cooking. The thighs and drumsticks — which contain more fat and are more forgiving — take the direct heat first. Flip at the halfway point to finish and brown the breast skin.
Do Not Exceed 4.5 Pounds
Birds larger than 4.5 lbs create two problems in a standard basket air fryer: they may not crisp evenly because the basket walls limit air circulation, and the longer required cook time can cause the smaller parts (wings, drumstick tips) to overcook while the deepest part of the thigh is still finishing. For birds over 5 lbs, use an oven-style air fryer or a conventional oven.
Use a Trivet or Rack If Available
If your air fryer includes an elevated rack or trivet, use it. Elevating the chicken off the basket floor allows the circulating air to reach the bottom of the bird, producing more even browning on all surfaces. Without a rack, the underside of the chicken often comes out paler than the top.
Let It Rest — Why 10 Minutes Matters
Resting cooked chicken is not optional etiquette — it is food science. As the chicken reaches 165°F, the muscle fibers contract and push moisture toward the center. During the 10-minute rest, these fibers relax and reabsorb the moisture, redistributing it throughout the meat. Carving immediately means losing that liquid onto the cutting board. Rest, then carve.
Variations
Herb Butter Whole Chicken
Soften 4 tablespoons of unsalted butter at room temperature. Mix in 2 teaspoons fresh thyme leaves, 1 teaspoon fresh rosemary (finely chopped), 3 cloves minced garlic, 1/2 teaspoon salt. Before applying the dry rub, carefully separate the breast skin from the meat with your fingers and slide half the herb butter under the skin directly onto the breast meat. Apply remaining butter to the exterior. The butter under the skin bastes the breast meat from the inside throughout cooking and produces an extraordinarily moist result.
Lemon Garlic Whole Chicken
Add the zest of 1 lemon and 1 teaspoon lemon juice to the dry rub. Cut the spent lemon in half and stuff both halves into the cavity along with 4 unpeeled garlic cloves. As the chicken cooks, the steam from the lemon and garlic perfumes the interior of the bird. This variation pairs well with fresh herbs — add a few sprigs of thyme or rosemary to the cavity alongside the lemon.
Spicy Cajun Whole Chicken
Replace the standard dry rub with a Cajun blend: 1 teaspoon smoked paprika, 1 teaspoon garlic powder, 1/2 teaspoon onion powder, 1/2 teaspoon dried oregano, 1/2 teaspoon dried thyme, 1/4 teaspoon cayenne, 1/4 teaspoon white pepper, 1 teaspoon kosher salt. This variation produces a deeply seasoned, mildly spicy bird with an extremely dark crust — adjust cayenne to your heat tolerance.
What to Serve with Air Fryer Whole Chicken
Classic Sides
- Air Fryer Baked Potato: Cook in the same fryer after the chicken rests — see Air Fryer Baked Potato
- Air Fryer Broccoli: 8 minutes at 380°F with olive oil and garlic — see Air Fryer Broccoli
- Air Fryer Carrots: 12 minutes at 380°F with butter and honey — see Air Fryer Carrots
- Simple green salad with vinaigrette (no cooking required)
Using Leftovers
A well-roasted whole chicken provides 3–4 days of protein from leftovers. Day 2: shred cold chicken over a salad. Day 3: use in tacos with avocado and salsa. Day 4: make chicken soup using the carcass. To make stock, place the carcass in a large pot with cold water, a quartered onion, two carrots, two celery stalks, a bay leaf, and salt. Simmer for 2–3 hours. Strain and refrigerate — use within 5 days or freeze for up to 3 months.
Storage and Reheating
Fridge and Freezer Guidelines
Store carved chicken in an airtight container in the refrigerator for up to 4 days. For longer storage, freeze in a zip-lock bag or airtight container for up to 3 months. Freeze carved portions (not the whole bird) for easier reheating and portioning.
How to Reheat in the Air Fryer Without Drying Out
The air fryer reheats chicken better than any other method. Set to 350°F for 5–8 minutes — skin will re-crisp and the meat will heat through without drying. For breast meat specifically, add a small splash (1–2 teaspoons) of chicken broth to the bottom of the basket before reheating to introduce a small amount of steam. Do not microwave leftover roast chicken — it dries the breast meat irreversibly.
Frequently Asked Questions
What size air fryer do I need for a whole chicken?
You need at least a 5.8-quart air fryer to fit a whole chicken up to 4.5 lbs. A 3.5–4 lb bird fits in most 5.8-qt basket models with 1 inch of clearance on each side. Larger birds (5+ lbs) require a 6–8 qt model or an oven-style air fryer. Always check basket dimensions, not just quart ratings — basket shape affects real-world clearance.
Do I need to flip the chicken halfway?
Yes, and it is not optional for best results. Starting breast-side down insulates the white meat from the direct bottom heat, keeping it moist. Flipping breast-side up for the second half allows the breast skin to brown and crisp. Skipping the flip produces uneven browning — pale breast skin and an overcooked exterior on the bottom of the bird.
How do I know when air fryer whole chicken is done?
Use an instant-read thermometer inserted into the thickest part of the thigh without touching the bone. The USDA food safety minimum for all poultry is 165°F. Time estimates vary by air fryer model — some run 5–10 minutes hotter or cooler than their dials indicate. The thermometer is the only reliable doneness indicator. (USDA Safe Temperature Chart)
Can I put stuffing inside an air fryer whole chicken?
It is not recommended. Stuffing inside the cavity slows heat penetration to the deepest part of the bird, making it significantly harder to reach safe internal temperature throughout the stuffing (which must also reach 165°F) without overcooking the exterior. Cook stuffing separately. A few aromatics (lemon halves, garlic cloves, fresh herbs) can go in the cavity safely without affecting cook time.
Why is my air fryer whole chicken skin not crispy?
The most common cause is excess moisture on the skin before cooking. Pat the chicken thoroughly dry — and if possible, refrigerate it uncovered for at least an hour before cooking to further dry the skin. Other causes: overcrowding (a chicken too large for the basket traps steam around itself), not preheating the air fryer, or insufficient cook temperature in the second phase. Increase to 390°F in the second phase for more aggressive crisping if your model allows.
For a complete reference on all air fryer temperatures and cook times, see our Air Fryer Cooking Times Chart. For keto-friendly ways to use the leftover chicken, see our 20 Best Keto Air Fryer Recipes.
Source: USDA FSIS Safe Minimum Internal Temperature Chart — poultry safe minimum: 165°F at the innermost part of the thigh, wing, and thickest part of the breast.