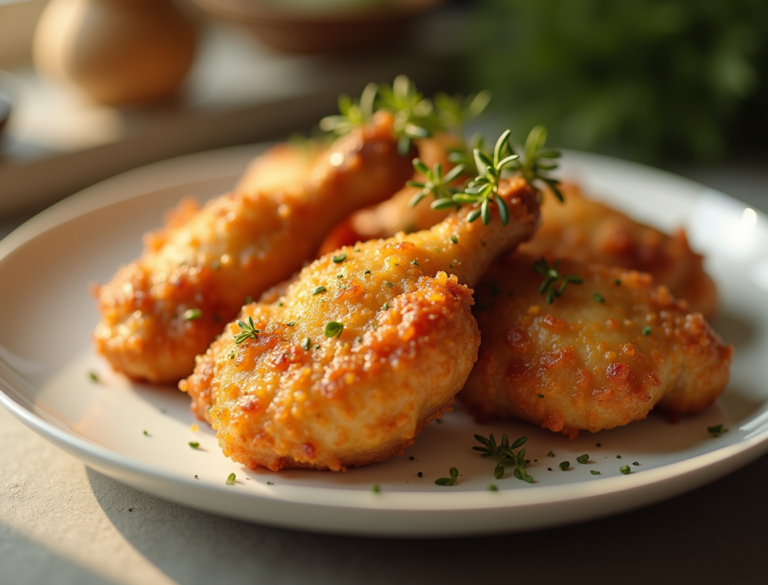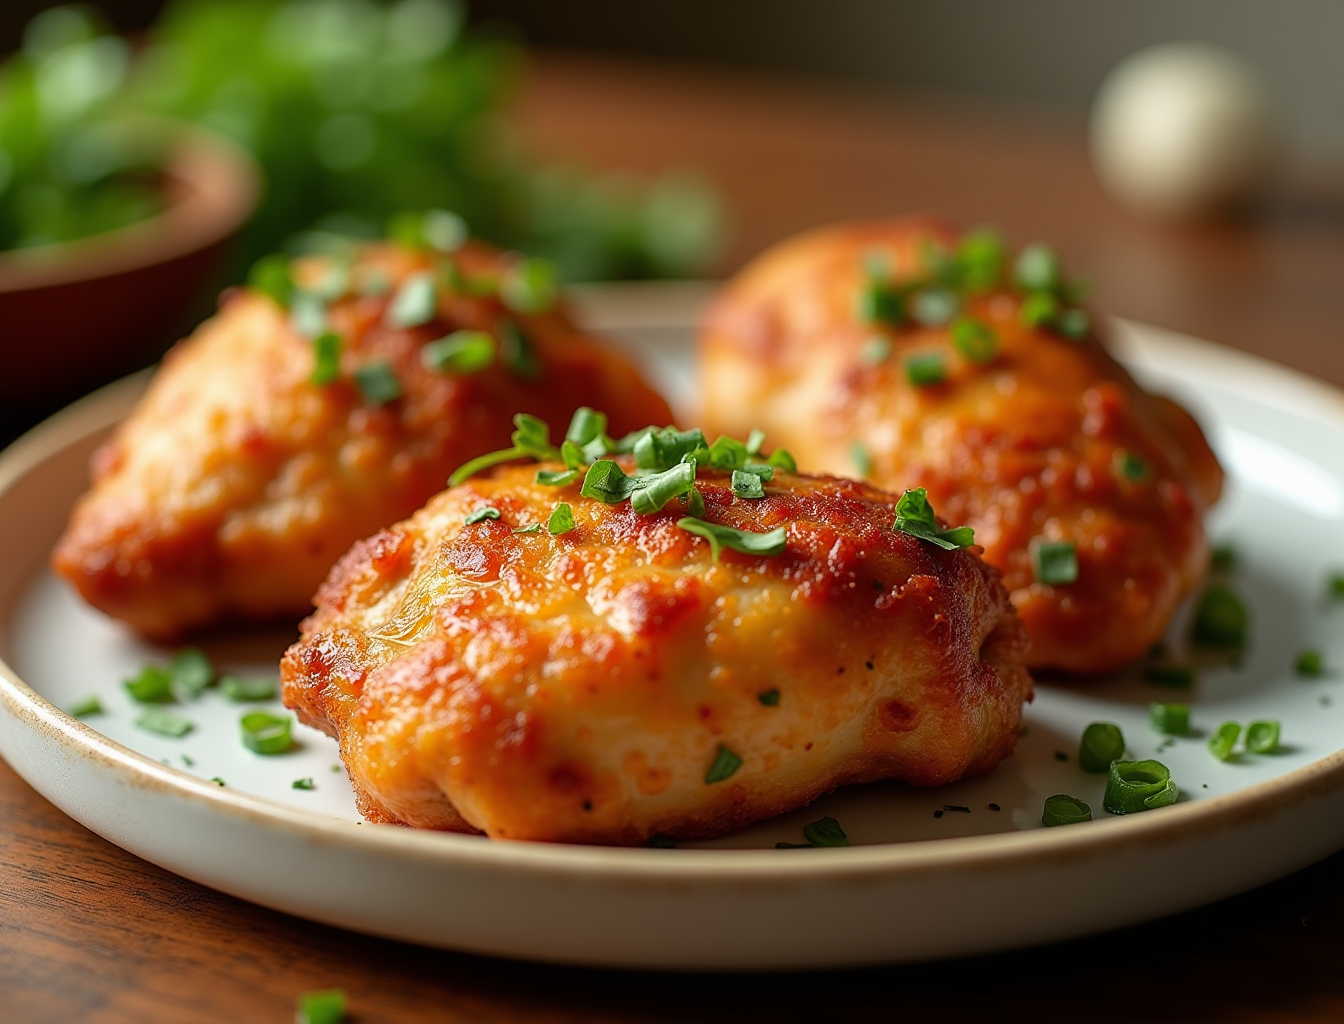
Air Fryer Boneless Chicken Thighs – Crispy & Juicy in 30 Mins!
Why Do Air Fryer Boneless Chicken Thighs Come Out Better Than Oven-Baked?
Air fryer boneless chicken thighs are one of the most reliable and rewarding recipes you can make in an air fryer. Unlike chicken breasts, which are easy to overcook and dry out, boneless skinless chicken thighs have enough natural fat content to stay juicy even if you cook them a few degrees past the minimum safe temperature. The air fryer’s rapid circulating heat creates a golden, slightly crispy exterior on the outside of each thigh in about 15–18 minutes — a result that takes 25–30 minutes to approximate in a conventional oven. The compact cooking chamber concentrates heat on all surfaces simultaneously, producing even browning without the need to sear in a separate pan. Whether you are making a quick weeknight dinner, prepping protein for the week, or cooking for a crowd, this method delivers consistent, juicy, deeply flavored chicken thighs with minimal prep and virtually no cleanup beyond wiping out the basket. This guide covers the complete method, verified cooking temperatures, pro tips for perfect results every time, and several variations to keep the recipe from ever getting boring.
Why Do Boneless Chicken Thighs Work So Well in the Air Fryer?
Dark meat chicken contains more intramuscular fat and connective tissue than white meat. This higher fat content serves as natural insulation during cooking — while a chicken breast dries out rapidly once it surpasses 165°F, a chicken thigh can be cooked to 175–185°F and actually becomes more tender and flavorful as the connective tissue breaks down. This means there is a much larger margin for error with thighs. A breast overcooked by 5 degrees can be noticeably dry; a thigh overcooked by 10–15 degrees is often better than one pulled at exactly 165°F.
The air fryer accelerates this process by applying intense, dry heat that mimics what a very hot cast iron pan or high-temperature oven would produce, but in a self-contained environment that requires no active monitoring. The fat renders out of the thigh during cooking, basting the surface from the inside, while the circulating hot air removes surface moisture and creates the caramelized crust that gives air fryer chicken thighs their distinctive texture.
Compared to pan-frying on the stovetop, the air fryer requires significantly less oil (a light spray versus a tablespoon or more of cooking oil in the pan), produces less smoke, and cooks both sides simultaneously rather than requiring careful flipping in hot oil. Compared to baking in the oven, it is roughly 30–40% faster and produces superior browning without needing a broiler step at the end.
What Ingredients and Equipment Do You Need?
Key Ingredients
- 1 lb (450 g) boneless, skinless chicken thighs (approximately 4 medium pieces)
- 1 teaspoon garlic powder
- 1 teaspoon smoked paprika
- ½ teaspoon onion powder
- ½ teaspoon salt
- ¼ teaspoon black pepper
- ¼ teaspoon dried oregano (optional but adds depth)
- Cooking oil spray (avocado oil or olive oil)
These seven pantry staples produce an excellent base chicken thigh that works in any direction — served over rice, sliced into salads, shredded into tacos, or eaten as a standalone protein with vegetables. The seasoning is versatile and neutral enough to pair with virtually any cuisine.
Equipment
- Air fryer (any basket-style model, 4–6 quart recommended)
- Instant-read meat thermometer (essential — the single most important tool for cooking chicken safely and consistently)
- Small mixing bowl or sheet pan for seasoning
- Paper towels for patting the chicken dry
No parchment paper, foil, or additional accessories are needed for this recipe. The chicken cooks directly in the basket on the oil-sprayed surface.
How Do You Cook Air Fryer Boneless Chicken Thighs Step by Step?
- Pat the chicken dry. Remove the thighs from their packaging and place them on a cutting board or plate. Use several paper towels to press firmly on all surfaces of each piece, absorbing as much surface moisture as possible. This step is critical for achieving a golden, slightly crispy exterior. Wet chicken steams rather than browns in the air fryer, and surface moisture is the number one enemy of good texture.
- Trim excess fat. Boneless skinless chicken thighs often have small pockets or flaps of excess fat attached to the edges. While some fat is beneficial for flavor and moisture, large fat deposits can render and drip into the basket, potentially causing smoke. Use kitchen scissors or a sharp knife to trim any large pieces of visible fat — but do not go overboard. You want to remove excess, not all fat.
- Season generously. In a small bowl or directly on a plate, mix together the garlic powder, smoked paprika, onion powder, salt, black pepper, and oregano. Sprinkle the spice blend over both sides of each chicken thigh and press gently so the seasoning adheres to the surface. If time allows, let the seasoned chicken rest for 5–10 minutes at room temperature before cooking — this allows the salt to begin drawing out and redistributing moisture in the surface layer, which improves both flavor penetration and browning.
- Preheat the air fryer. Set the air fryer to 400°F (200°C) and preheat for 3–5 minutes. Preheating is more important for chicken thighs than for many other air fryer recipes because it ensures the exterior begins crisping immediately, which traps the juices inside the meat during the rest of the cook time.
- Load the basket. Spray the air fryer basket lightly with cooking oil spray. Arrange the chicken thighs in a single layer with the smooth side down (the side that originally had skin). Leave at least ½ inch of space between each piece for air circulation. Do not stack. Spray the tops lightly with oil — this promotes even browning on the upper surface.
- Cook. Air fry at 400°F for 12–16 minutes, flipping each thigh at the halfway point (6–8 minutes in). When you flip, spray the newly exposed surface lightly with oil before continuing. The total cook time varies based on the thickness of your thighs — thin, small thighs may be done at 12–13 minutes while thick, large thighs may need 16–18 minutes.
- Check the internal temperature. Insert an instant-read thermometer into the thickest part of the largest thigh, avoiding fat pockets. For safe consumption, the minimum target is 165°F (74°C) per USDA guidelines. For the most tender, juicy result with dark meat, pull the thighs when they reach 175°F (79°C) — at this temperature the connective tissue has fully broken down and the texture is noticeably better than at 165°F.
- Rest before serving. Transfer the cooked thighs to a plate or cutting board and rest for 3–5 minutes before cutting or serving. This brief rest allows the cooking juices to redistribute from the hot outer layers back toward the center of the meat, producing a juicier final bite.
Temperature and time verified across multiple tested sources: 400°F for 12–16 minutes is used by Mary’s Whole Life and Winding Creek Ranch. Pinch of Yum reports results in 15 minutes. USDA minimum internal temperature for all poultry is 165°F.
What Are the Pro Tips for Perfectly Juicy Air Fryer Chicken Thighs?
Tip 1: Pat Completely Dry Before Seasoning
This bears repeating because it has the largest single impact on the final texture of the chicken. Surface moisture creates steam, and steam actively prevents the Maillard browning reaction that produces the golden, slightly crispy crust on the outside of each thigh. Take 30 extra seconds to pat every surface — top, bottom, and edges — thoroughly dry with paper towels. If you have time, place the uncovered raw thighs on a wire rack in the refrigerator for 30 minutes to an hour before cooking. This “air drying” step removes even more surface moisture and produces a noticeably better crust.
Tip 2: Spray Oil After Preheating
Spray the air fryer basket and the tops of the thighs with oil spray after the basket has been preheated. Oil applied before preheating can partially polymerize and become sticky, which increases the chance of the chicken sticking to the basket surface. Spraying onto a hot basket means the oil goes directly onto the food surface rather than being partially absorbed by the basket coating first.
Tip 3: Do Not Skip the Halfway Flip
The surface of the chicken resting against the basket receives direct radiant heat from the heated basket floor plus circulating air from above. The top surface only receives circulating air. Without flipping, the underside will significantly overcook before the top has adequate browning. Flip at the halfway point and spray the top with a light coat of oil immediately after flipping for even color on both sides.
Tip 4: Cook to 175°F, Not Just 165°F
This is the most important tip for anyone who has been pulling chicken thighs at the minimum safe temperature of 165°F and wondering why they are not as tender as restaurant dark meat. Dark meat chicken tastes best when cooked to an internal temperature of 175–185°F because the higher temperature allows the collagen in the connective tissue to fully break down into gelatin, which gives the meat a silky, rich texture rather than the slightly rubbery texture that dark meat can have at exactly 165°F. Cooking to 175°F is safe, produces better results, and does not compromise juiciness because of the natural fat content in thigh meat.
Tip 5: Avoid Overcrowding at All Costs
Overcrowding is the cause of the most common air fryer disappointment: pale, soft, unevenly cooked chicken with no crust. When pieces are touching or overlapping, the hot air cannot reach the surfaces between them, and the steam released from the chicken collects between pieces rather than escaping. The result is steamed chicken rather than air-fried chicken. Cook in a single layer with space between each piece. For a full pound of chicken thighs (4–5 pieces), this is usually achievable in one batch in a 5–6 quart air fryer. If you have more than 5 thighs, cook in two batches and keep the first batch warm in a 200°F oven while the second cooks.
What Variations Can You Make with Air Fryer Boneless Chicken Thighs?
Spicy Cajun Chicken Thighs
Replace the standard seasoning blend with a Cajun spice mixture: 1 teaspoon smoked paprika, ½ teaspoon cayenne, ½ teaspoon garlic powder, ½ teaspoon onion powder, ½ teaspoon dried thyme, ¼ teaspoon dried oregano, ¼ teaspoon black pepper, and ½ teaspoon salt. This Cajun blend produces a deeply spiced, reddish-brown crust with significant heat. Serve with cooling sides like coleslaw, pickled vegetables, or a yogurt-based dipping sauce to balance the spice. This variation works particularly well shredded over rice bowls or in sandwiches.
Herb-Crusted Mediterranean Thighs
Mix together 1 teaspoon dried oregano, 1 teaspoon dried basil, ½ teaspoon garlic powder, the zest of one lemon, ½ teaspoon salt, and ¼ teaspoon pepper. Season the thighs and cook as directed. After cooking, immediately squeeze fresh lemon juice over the finished chicken. The bright acid cuts through the richness of the dark meat and lifts all the flavors. Serve with roasted vegetables, tzatziki, and warm pita bread for a complete Mediterranean-style meal.
Honey-Soy Glazed Chicken Thighs
Use the base seasoning recipe without the paprika. In the final 2 minutes of cooking, brush a glaze of 2 tablespoons honey, 1 tablespoon soy sauce, ½ teaspoon sesame oil, and ¼ teaspoon ground ginger over the top of each thigh. Close the basket and allow the last 2 minutes to set the glaze. The sugars in the honey caramelize quickly in the air fryer and create a sticky, glossy finish. Watch carefully — honey burns fast at high heat. Sprinkle with sesame seeds and sliced scallions after removing from the basket.
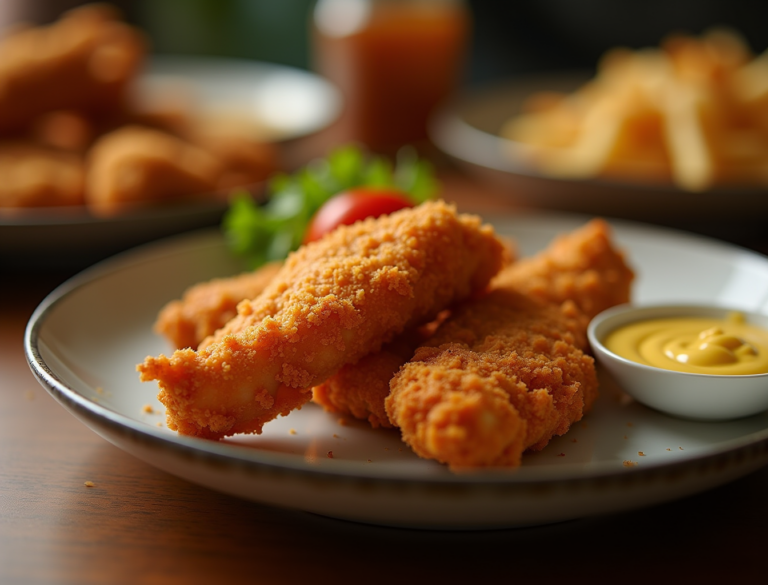
Breaded Crispy Chicken Thighs
For a texture closer to a fried chicken thigh, add a simple breading step. Dip the seasoned, dry chicken thighs in a beaten egg, let excess drip off, then press firmly into a mixture of panko breadcrumbs seasoned with the same spice blend. Spray liberally with oil and air fry at 375°F (reduce from 400°F to prevent burning the breadcrumbs) for 16–20 minutes, flipping at the halfway point. The panko creates a substantially thicker, crunchier crust that holds up well for sandwiches and holds its texture longer after serving.
Lemon Pepper Chicken Thighs
This straightforward variation uses lemon zest, cracked black pepper, garlic powder, and salt. The key is using freshly cracked black pepper rather than pre-ground — the coarser texture creates more surface texture for crisping and a more pronounced pepper flavor. After cooking, squeeze fresh lemon juice over the thighs and finish with a small drizzle of good olive oil. Clean, bright, and versatile enough to serve with any side dish.
How Do You Store and Reheat Air Fryer Chicken Thighs?
Cooked chicken thighs are one of the best proteins for meal prep because they reheat beautifully and maintain good quality for several days in the refrigerator. Their higher fat content compared to chicken breasts means they are far more forgiving of the brief drying effect that reheating can have on leaner proteins.
Refrigerator storage: Allow cooked thighs to cool to room temperature within 2 hours of cooking. Store in an airtight container for up to 3–4 days. They can be stored whole or pre-sliced — pre-slicing makes them convenient to add to salads, grain bowls, or wraps throughout the week without additional prep.
Freezer storage: Cool completely before freezing. Freeze in a single layer on a parchment-lined sheet until solid, then transfer to a freezer bag with as much air removed as possible. Label with the date. Frozen cooked chicken thighs keep quality for up to 3 months. Thaw in the refrigerator overnight before reheating.
Reheating in the air fryer: The best reheating method. Reheat at 350°F (175°C) for 4–6 minutes from refrigerated, or 8–10 minutes from frozen (thawed). A light spray of oil before reheating restores some of the original surface crispiness. The air fryer is significantly better than the microwave for reheating chicken because it does not introduce moisture, which would soften the exterior.
Reheating in a skillet: Add a small amount of oil or butter to a pan over medium heat. Cook the thighs for 3–4 minutes per side until warmed through. This method re-crisps the exterior and produces excellent results, though it requires more attention than air fryer reheating.
For a full reference on cooking times for chicken and all other proteins in the air fryer, see the Air Fryer Cooking Times Chart — covering over 100 foods with verified temperatures and times.
Frequently Asked Questions About Air Fryer Boneless Chicken Thighs
Can I cook frozen boneless chicken thighs in the air fryer?
Yes, with important modifications. Frozen raw boneless chicken thighs cook unevenly in the air fryer if cooked from fully frozen because the exterior overcooks by the time the center reaches a safe temperature. If you must cook from frozen, set the air fryer to 360°F and cook for 5 minutes, then break the thighs apart from each other and lay them in a single layer. Continue cooking for another 12–18 minutes at 400°F, flipping at the halfway point, until the internal temperature reaches 165°F. Total time from frozen is typically 18–22 minutes. Always verify with a thermometer — frozen chicken size varies significantly. Avoid the urge to rush with higher heat, as this produces a rubbery, unevenly cooked result.
How do you know when boneless chicken thighs are fully cooked?
The only reliable method is an instant-read meat thermometer. Insert it into the thickest part of the meat, avoiding any fat pockets. The USDA minimum safe temperature for all poultry is 165°F (74°C). For chicken thighs specifically, 175°F (79°C) produces better texture and flavor. Visual cues that suggest doneness include: the juices running clear (not pink) when the meat is pierced with a fork, the exterior being golden brown on both sides, and the meat feeling firm rather than soft when pressed. However, these visual cues can be misleading — a thermometer is the only accurate test.
Can I bake chicken thighs in the oven instead of using an air fryer?
Yes. Boneless skinless chicken thighs bake well in a conventional oven at 400°F (205°C) for 25–30 minutes, or until the internal temperature reaches 165–175°F. Place on a wire rack set over a baking sheet so the underside does not sit in its own juices and steam. For a crispier exterior, switch to the broiler for the final 3–4 minutes and watch closely to prevent burning. The oven produces a less intensely browned exterior than the air fryer but is a reliable substitute when cooking large quantities that exceed the air fryer basket capacity.
Should I marinate the chicken before air frying?
Yes — marinating significantly improves the flavor of boneless chicken thighs, and they are particularly well suited to marinades because their fat content absorbs flavor compounds more readily than lean breast meat. The key is to pat the marinated chicken very dry with paper towels before air frying, even if that means removing most of the marinade coating. Wet marinades create steam in the basket that prevents crisping. The flavor will have already penetrated the meat during marinating — the surface moisture is what you want to remove. A 30-minute marinade makes a noticeable flavor difference; overnight marinating produces deeply flavored chicken. Acid-based marinades (lemon juice, yogurt, vinegar) should not exceed 4 hours or the acid begins breaking down the surface proteins and creating a mushy texture.
Why are my chicken thighs chewy instead of tender?
Chewy texture in air fryer chicken thighs usually has one of two causes: under-cooking or over-cooking. Undercooked dark meat (pulled at exactly 165°F) can have a slightly rubbery, bouncy texture because the connective tissue has not fully broken down. The solution is to cook to 175–185°F. Overcooked, very dry chicken thighs can also be tough in a fibrous way. If you are consistently getting chewy, dry chicken, check that your air fryer thermometer is accurate (a separate oven thermometer can verify this) and that you are not cooking well past the target temperature. Overcrowding can also cause chewy results because the trapped steam does not allow the surface to develop properly.
Sources consulted: Mary’s Whole Life, Winding Creek Ranch, Pinch of Yum, The Almond Eater, Foodess