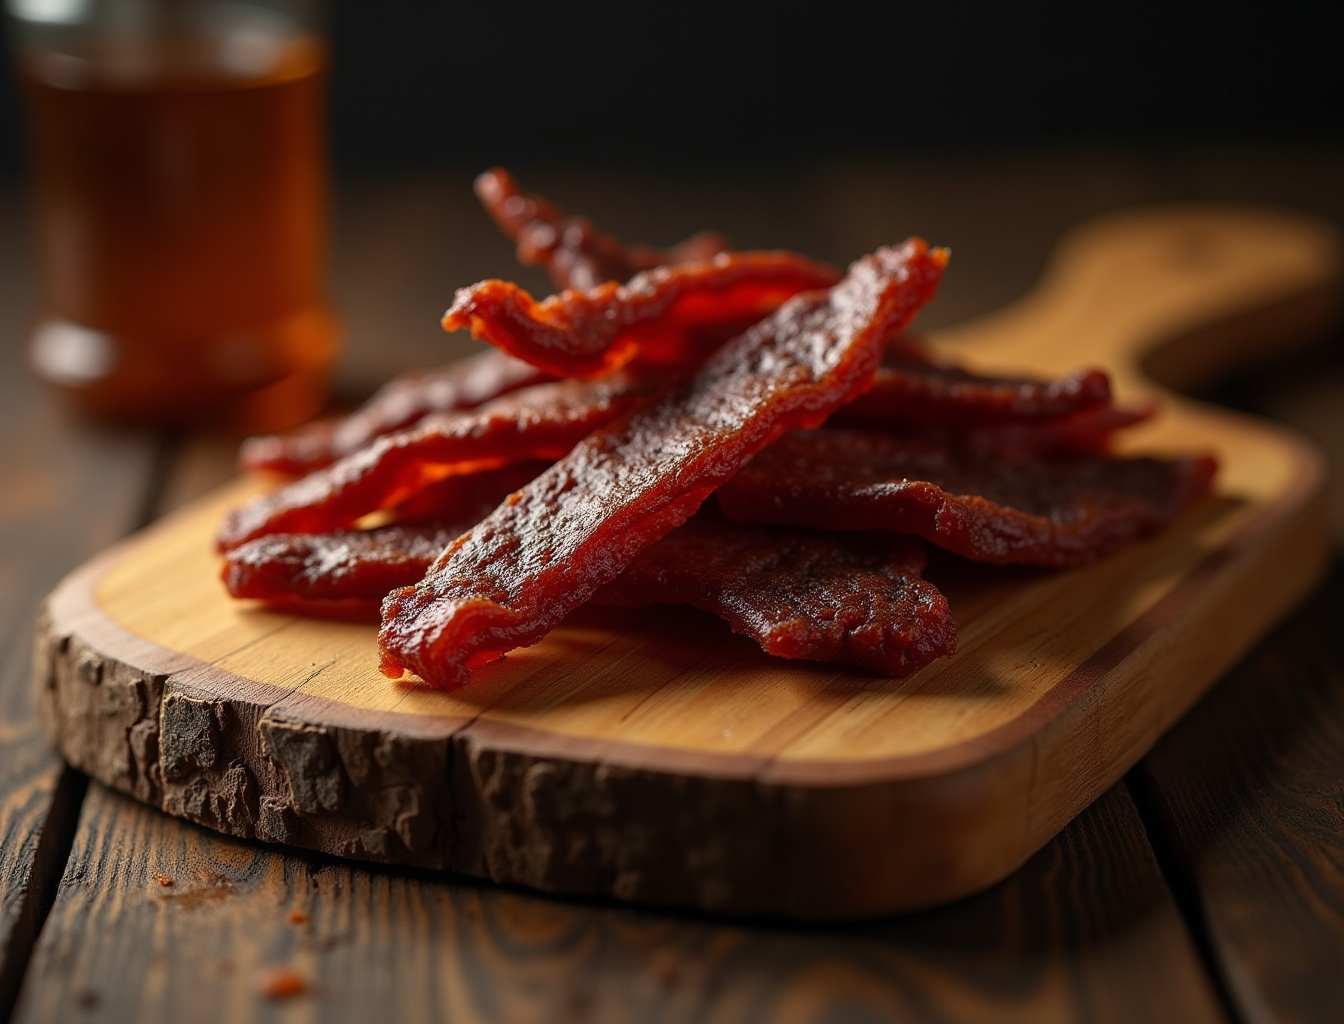
Air Fryer Beef Jerky (Chewy, Smoky, and Ready in 3 Hours)
Air Fryer Beef Jerky
Homemade beef jerky made in the air fryer using a classic soy-Worcestershire marinade. Chewy, smoky, and done in about 3.5 hours of cooking time — no dehydrator required.
- Prep Time: 1 hour
- Cook Time: 3 hours 30 minutes
- Total Time: 12 hours 30 minutes
- Yield: about 6 servings 1x
- Category: Snack
- Method: Air Fryer
- Cuisine: American
Ingredients
- 1.5 lbs top round steak, trimmed of all visible fat
- 1/4 cup soy sauce
- 2 tablespoons Worcestershire sauce
- 1 tablespoon brown sugar
- 1 teaspoon garlic powder
- 1 teaspoon smoked paprika
- 1/2 teaspoon onion powder
- 1/2 teaspoon black pepper
Instructions
- Place the trimmed steak in the freezer for 45 minutes until firm but not fully frozen. This makes thin, uniform slicing much easier.
- Slice the beef against the grain into 1/8 to 1/4 inch strips, aiming for consistent thickness throughout.
- Whisk all marinade ingredients together in a small bowl until the sugar dissolves.
- Add beef strips to a zip-lock bag, pour in the marinade, remove as much air as possible, and seal. Massage to coat all pieces, then refrigerate for 4–8 hours or overnight.
- Remove beef from the marinade. Lay each strip on paper towels and pat both sides completely dry — excess moisture creates steam and prevents proper dehydration.
- Arrange strips in a single layer in the air fryer basket without overlapping. Cook in batches if needed.
- Set to the dehydrate setting at 160°F (or the lowest air fry setting available) and cook for 2 hours.
- Flip each strip and continue cooking for another 1.5 hours.
- Test for doneness: jerky should bend and crack slightly without snapping. Cool completely before sealing for storage.
Notes
Partial freeze tip: 30–45 minutes in the freezer makes thin, even slicing much easier without a meat slicer.
Pat strips completely dry before cooking — any surface moisture steams rather than dehydrates, resulting in a softer, less shelf-stable jerky.
Do not overlap strips in the basket; overlapping traps moisture and causes uneven drying.
Per USDA guidelines, beef should reach an internal temperature of 160°F during the drying process for food safety.
Store-bought beef jerky costs $7–$10 per ounce. Homemade air fryer beef jerky made from top round costs roughly $3 per ounce — and it tastes better. No dehydrator required. No special equipment. Just your air fryer, a pound and a half of beef, a marinade that takes 5 minutes to mix, and patience for the slow dry.
The technique most people get wrong is slicing. Get that right and everything else follows. Here is the complete guide.
Can You Make Beef Jerky in an Air Fryer?
Yes — and the results are excellent. The air fryer handles jerky-making in two ways: models with a dedicated dehydrate setting (operating at 130–160°F) produce a true dehydrated jerky — chewy, pliable, and shelf-stable. Standard air fryers without a dehydrate setting can still make jerky using the lowest air fry temperature setting, though the result is somewhat drier and more cooked-textured than true dehydrated jerky.
Air Fryer vs Dedicated Dehydrator for Jerky
| Factor | Air Fryer (Dehydrate Setting) | Air Fryer (Low Air Fry) | Dedicated Dehydrator |
|---|---|---|---|
| Temperature range | 130–160°F | 175–200°F (min) | 130–160°F |
| Texture result | Chewy, traditional | Drier, slightly firmer | Chewy, traditional |
| Batch capacity | Limited (1–2 layers) | Limited (1–2 layers) | 4–10 trays |
| Speed | 2.5–3.5 hours | 1.5–2.5 hours | 4–8 hours |
| Cost | No additional equipment | No additional equipment | $30–$200 for unit |
Which Air Fryers Work Best for Jerky
Any air fryer with a dehydrate setting that operates at 160°F or below produces the best results: Ninja models with the dehydrate function (including the DZ401, AF161, and Foodi series), Cosori units with a dehydrate setting, and Instant Vortex models. If your air fryer’s lowest setting is 200°F or higher, you can still make jerky — it will be drier and cook faster, requiring closer monitoring. Check your user manual for the minimum temperature setting before starting.
What Are the Best Cuts of Beef for Air Fryer Jerky?
Top Round vs Flank Steak vs Sirloin
Top round is the best cut for jerky — it is lean, affordable (typically $4–$7/lb), and has a consistent grain that slices cleanly. The low fat content is critical: fat does not dehydrate; it goes rancid. Fatty jerky has a shorter shelf life and a greasy texture.
Flank steak is the second-best option — strong beef flavor, with a pronounced grain that makes it easy to slice against for maximum chewiness. Slightly more expensive than top round.
Eye of round is a lean alternative with a tight, consistent grain — excellent for jerky.
Avoid: ribeye, chuck, brisket, or any heavily marbled cut. The fat content dramatically reduces shelf life and produces an unpleasant greasy texture once dried.
How Thick to Slice: The Exact Measurement
Slice beef to 1/8 to 1/4 inch thick. This is the most important variable in jerky texture:
- 1/8 inch: Produces chewy but pliable jerky — the most popular texture. Dries faster (2–2.5 hours at 160°F).
- 3/16 inch: A middle ground between chewy and meaty — slightly more chew with a heartier bite.
- 1/4 inch: Produces thicker, meatier jerky — more chew per bite. Takes 3–3.5 hours to fully dry.
Getting consistent thickness without a meat slicer is the hardest part of homemade jerky — see the partial freeze tip in the Pro Tips section below.
Slicing Against the Grain vs With the Grain
This choice determines the final texture more than almost anything else:
- Against the grain (perpendicular to the muscle fibers): produces chewy jerky that tears easily and is easier to eat. Recommended for most people.
- With the grain (parallel to the muscle fibers): produces tougher, more fibrous jerky with more pull and resistance. Preferred by jerky purists and those who want the maximum chew.
For most air fryer jerky recipes, slicing against the grain is recommended — the slightly reduced drying time and easier eating experience suit the home cook better than the industrial-scale dehydrator approach.
The Best Beef Jerky Marinade
Base Marinade (Soy + Worcestershire)
This is the classic jerky marinade ratio that every variation builds from:
- 1/4 cup soy sauce (or coconut aminos for a soy-free version)
- 2 tablespoons Worcestershire sauce
- 1 tablespoon brown sugar (or honey)
- 1 teaspoon garlic powder
- 1 teaspoon onion powder
- 1/2 teaspoon black pepper
- 1/2 teaspoon smoked paprika
- Optional: 1/4 teaspoon liquid smoke, red pepper flakes, ground ginger
This ratio produces jerky with the right balance of salt (preservation), umami (depth of flavor), and sweet-savory contrast. Adjust to taste — but do not reduce the soy sauce significantly, as the salt content plays a role in the preservation and texture of the finished jerky.
How Long to Marinate
Minimum: 4 hours in the refrigerator. Ideal: 8–12 hours (overnight). Maximum: 24 hours — beyond this, the salt breaks down the protein texture and the jerky becomes mushy on the surface rather than firm.
Marinate in a zip-lock bag with the air removed, turning the bag once at the halfway point to ensure all surfaces are in contact with the marinade.
Air Fryer Beef Jerky — Full Recipe
Ingredients
- 1.5 lbs top round steak, trimmed of all visible fat
- 1/4 cup soy sauce
- 2 tablespoons Worcestershire sauce
- 1 tablespoon brown sugar
- 1 teaspoon garlic powder
- 1 teaspoon smoked paprika
- 1/2 teaspoon onion powder
- 1/2 teaspoon black pepper
Step-by-Step Instructions
- Partially freeze the beef: Place the trimmed steak in the freezer for 30–45 minutes until firm but not fully frozen. This makes uniform, thin slicing dramatically easier — see Pro Tips below.
- Slice the beef: Cut against the grain into 1/8 to 1/4 inch strips. Aim for consistent thickness throughout.
- Mix the marinade: Whisk all marinade ingredients together in a small bowl until sugar dissolves.
- Marinate: Add beef strips to a zip-lock bag, pour in the marinade, remove as much air as possible, and seal. Massage to coat all pieces. Refrigerate for 4–8 hours (overnight preferred).
- Pat dry before cooking: Remove beef from marinade. Lay each strip on paper towels and pat both sides completely dry. Excess marinade creates steam and prevents proper dehydration.
- Arrange in single layer: Place strips in a single layer in the air fryer basket. Do not overlap — overlapping pieces trap moisture between them and dry unevenly. Cook in batches if needed.
- Set temperature and time: Use the dehydrate setting at 160°F, or the lowest air fry setting available. Cook for 2 hours.
- Flip and continue: At the 2-hour mark, flip each strip and return for another 1–1.5 hours.
- Test for doneness: Use the bend test (see below). Cool completely before sealing for storage.
Temperature and Time Settings
Per USDA food safety guidance, the USDA recommends heating beef to 160°F before or during the dehydration process to eliminate pathogens. (USDA FSIS Jerky and Food Safety) For home air fryer jerky cooked at 160°F on the dehydrate setting, the internal temperature of the beef reaches 160°F during the cook — satisfying this safety requirement. If using a setting below 160°F, pre-heat the marinated strips briefly at 275°F for 5 minutes before reducing to the dehydrate temperature.
How to Test for Doneness: The Bend Test
Remove a piece of jerky and let it cool for 2 minutes. Fold it in half. Properly dried jerky will:
- Crack or split on the surface at the bend — this is ideal
- Show white fibers at the crack point
- Not feel soft or wet in the center
If the piece bends without cracking, it needs more time. If it snaps cleanly and crumbles, it is over-dried (still safe to eat, but the texture is not ideal). The target is “cracks but does not snap.”
Temperature and Time Chart
| Setting | Thickness | Time Range | Result Texture |
|---|---|---|---|
| 145°F dehydrate | 1/8 inch | 3–3.5 hours | Soft, very pliable |
| 160°F dehydrate | 1/8 inch | 2–2.5 hours | Chewy, traditional (ideal) |
| 160°F dehydrate | 1/4 inch | 3–3.5 hours | Extra chewy, meaty |
| 175°F air fry (low) | 1/8 inch | 1.5–2 hours | Drier, firmer, slightly cooked-textured |
| 200°F air fry (minimum for some models) | 1/8 inch | 1–1.5 hours | Cooked/dried, less chewy |
Times are approximate and vary by air fryer model. Start checking doneness 30 minutes before the upper time estimate using the bend test.
Pro Tips for Perfect Jerky
Partially Freeze Beef for Even Slices
This is the single step that separates home jerky that looks professional from jerky that looks like someone cut it freehand after a long day. Place the trimmed steak in the freezer for 30–45 minutes — until it is firm throughout but not frozen solid. At this firmness, a sharp knife glides through the meat cleanly and consistently, producing uniform slices that dehydrate at the same rate. Fully thawed beef compresses under the knife and produces uneven, ragged cuts.
Pat Completely Dry Before Air Frying
Excess marinade on the surface of the meat creates steam in the air fryer, which works directly against the dehydration process. After removing strips from the marinade, lay them on a double layer of paper towels and press with additional paper towels on top. The surface should look dry, not wet or shiny, before going into the basket.
Prop the Basket Lid Slightly for Moisture Escape
Some air fryer models seal the basket drawer tightly, which traps steam during the dehydration process. If your model allows, prop the drawer slightly open with a folded piece of aluminum foil during the cook. This promotes moisture evacuation and produces drier, more shelf-stable jerky. Check your model’s manual to confirm this is safe to do.
Flip at the 2-Hour Mark
The underside of the jerky sitting against the basket floor dries more slowly than the top surface. Flipping at the 2-hour mark ensures both sides are exposed to the same amount of drying heat and produces evenly dried, consistent jerky throughout the batch.
Cool Completely Before Sealing
Warm jerky placed in an airtight container traps heat and creates condensation on the interior of the container. This moisture re-introduces humidity into the dried jerky, reducing shelf life significantly. Cool strips on a wire rack or paper towel for at least 20–30 minutes until fully room temperature before sealing.
Variations
Teriyaki Beef Jerky
Swap the Worcestershire sauce for 2 tablespoons mirin and 1 tablespoon rice vinegar. Add 1 teaspoon sesame oil and increase the brown sugar to 2 tablespoons. The mirin adds subtle sweetness and a slight shine to the finished jerky. Optional: finish with a pinch of toasted sesame seeds after the bend test passes.
Spicy Sriracha Jerky
Add 1 tablespoon Sriracha and 1 teaspoon red pepper flakes to the base marinade. For serious heat: double the Sriracha and add 1/4 teaspoon cayenne. The Sriracha caramelizes slightly during dehydration, adding a subtle sweetness underneath the heat that balances the spice level.
Classic Peppered Jerky (Deli Style)
Double the black pepper in the base marinade. Add 1/4 teaspoon cayenne and 1 teaspoon coarse sea salt. Reduce soy sauce to 3 tablespoons and omit the brown sugar entirely — the pepper-forward profile is balanced by the salt without the sweetness. This is the closest to classic deli-counter beef jerky of any variation in this list.
Storage and Shelf Life
How Long Does Homemade Jerky Last?
Shelf life depends significantly on how thoroughly the jerky was dried and how it is stored:
- Room temperature, airtight container: 1–2 weeks
- Refrigerator, airtight container: Up to 1 month
- Vacuum sealed, room temperature: Up to 2 months
- Vacuum sealed, refrigerated: Up to 6 months
Signs that jerky has spoiled: visible mold, off smell, or slimy texture. If in doubt, discard. The bend test can also indicate under-drying — jerky that still feels soft or bends without cracking after cooling has residual moisture and will mold faster at room temperature. Store this batch in the refrigerator.
Airtight Container vs Vacuum Seal
For jerky consumed within 2 weeks, an airtight glass jar or zip-lock bag with the air pressed out works well. For longer storage or mailing as gifts, vacuum sealing is significantly more effective — it removes virtually all oxygen, which is the primary driver of fat oxidation and mold growth in dried meat. A vacuum sealer pays for itself quickly if you make jerky regularly. Store vacuum-sealed jerky away from direct sunlight and heat sources.
Frequently Asked Questions
Can all air fryers make beef jerky?
Most air fryers can make jerky, but models with a dedicated dehydrate setting operating at 130–160°F produce the best chewy, traditional texture. Air fryers with a minimum temperature of 200°F will produce drier, slightly over-cooked jerky rather than true dehydrated texture — still edible and safe, but the texture difference is noticeable. Check your model’s minimum temperature in the manual before planning a jerky batch.
What is the best cut of beef for air fryer jerky?
Top round is the best choice — lean, affordable, and it slices cleanly. Flank steak and eye of round are excellent alternatives. Avoid any heavily marbled cut (ribeye, chuck, brisket) — fat does not dehydrate, it goes rancid, reducing shelf life significantly and creating an unpleasant greasy texture.
How do I know when air fryer jerky is done?
The bend test: let a strip cool for 2 minutes, then fold it in half. Properly dried jerky cracks on the surface at the fold but does not snap completely. If it bends without cracking, it needs more time. If it snaps and crumbles, it is over-dried. The target texture is firm, slightly pliable, with a crack at the bend point.
Is homemade air fryer jerky safe to eat?
Yes, when handled correctly. The USDA recommends heating beef to 160°F before or during the dehydration process. When using the 160°F dehydrate setting, the meat reaches this temperature during the cook. For settings below 160°F, pre-heat the strips briefly at a higher temperature before dehydrating. Always marinate in the refrigerator (never at room temperature), and cool completely before sealing. (USDA FSIS Jerky and Food Safety)
Why is my air fryer beef jerky not chewy?
Three common causes: (1) sliced too thin — 1/8-inch or less at lower temperatures produces a drier, crispier result; aim for 3/16 to 1/4 inch for maximum chew; (2) cooked at too high a temperature (175°F or above) — high temperatures cook the protein faster and produce a firmer, drier texture rather than the pliable chew of low-temperature dehydration; (3) over-dried — check at the 2.5-hour mark and pull pieces as they reach the bend-test target rather than cooking the entire batch to the same end time.
For a complete reference on all air fryer temperatures and dehydrate settings, see our Air Fryer Cooking Times Chart. For more keto-friendly high-protein air fryer recipes, see our 20 Best Keto Air Fryer Recipes.
Sources: USDA FSIS — Jerky and Food Safety. USDA FSIS Safe Minimum Internal Temperature Chart. Product specifications from manufacturer documentation.