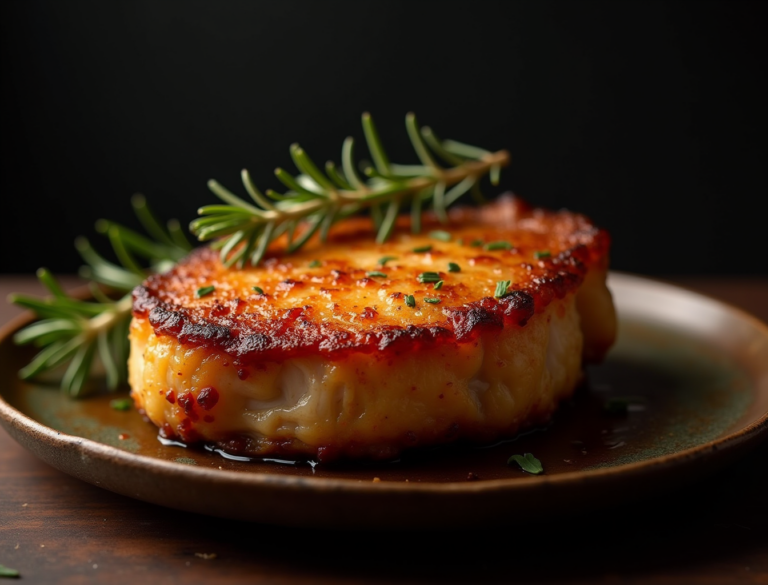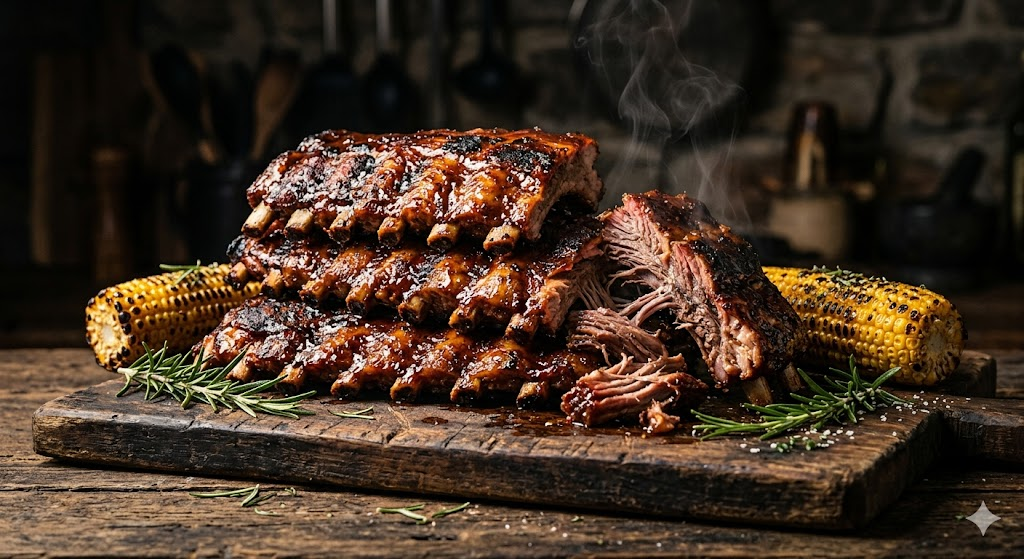
Air Fryer Baby Back Ribs: Fall-Off-Bone in Half the Time
Traditional low-and-slow ribs are great — but they take 4–6 hours. Air fryer baby back ribs are a completely legitimate shortcut that takes about an hour and produces ribs that are tender, deeply flavored, and sticky with BBQ sauce. The trick is a dry rub, a covered pre-cook to build tenderness, and a final basting blast at high heat. You won’t fool a pitmaster, but you’ll impress everyone at the dinner table.
PrintAir Fryer Baby Back Ribs
Tender, fall-off-bone baby back ribs made in the air fryer in about 40 minutes using a smoky dry rub and a two-stage cook — low heat with a foil tent for tenderness, then high heat with BBQ sauce for caramelized stickiness.
- Prep Time: 15 minutes
- Cook Time: 40 minutes
- Total Time: 55 minutes
- Yield: 2–3 servings 1x
- Category: Dinner
- Method: Air Fryer
- Cuisine: American
Ingredients
- 1 rack baby back ribs (about 2–2.5 lbs)
- ¾ cup BBQ sauce (your favorite or homemade)
- Dry Rub:
- 2 tablespoons brown sugar
- 1 tablespoon paprika (smoked preferred)
- 1 teaspoon garlic powder
- 1 teaspoon onion powder
- 1 teaspoon chili powder
- ½ teaspoon cumin
- ½ teaspoon salt
- ½ teaspoon black pepper
- ¼ teaspoon cayenne (optional)
Instructions
- Remove the membrane from the bone side of the rack: use a butter knife to loosen one end, grip it with a paper towel, and pull it off in one piece.
- Cut the rack into sections that fit your air fryer basket (typically 3–4 pieces for a 5.8-quart basket).
- Mix all dry rub ingredients. Coat every surface of each rib section, pressing the rub in firmly. For best flavor, rest the rubbed ribs in the fridge for 1–4 hours (or overnight); 30 minutes also works.
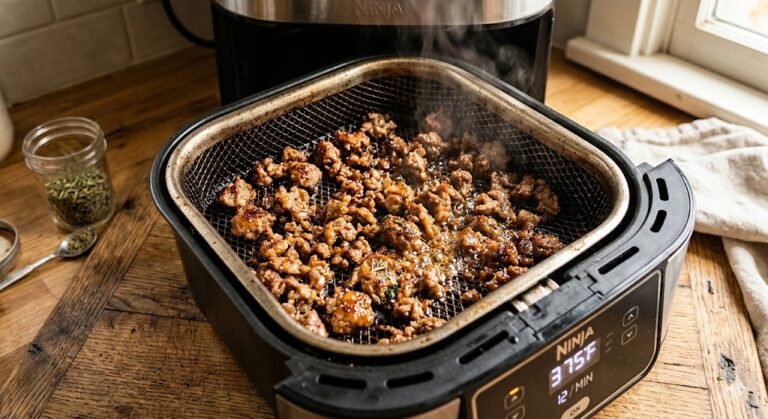
- Stage 1: Preheat air fryer to 300°F. Place rib sections bone-side up in the basket and loosely tent the basket with foil to trap steam. Cook for 25 minutes.
- Stage 2: Remove the foil and flip the ribs meaty-side up. Increase temperature to 380°F. Brush a generous coat of BBQ sauce over the tops and cook for 10 minutes.
- Brush with a second coat of BBQ sauce and cook for another 5 minutes, until the sauce is caramelized and sticky. Internal temperature between the bones should reach 190–200°F for fall-off-bone tenderness.
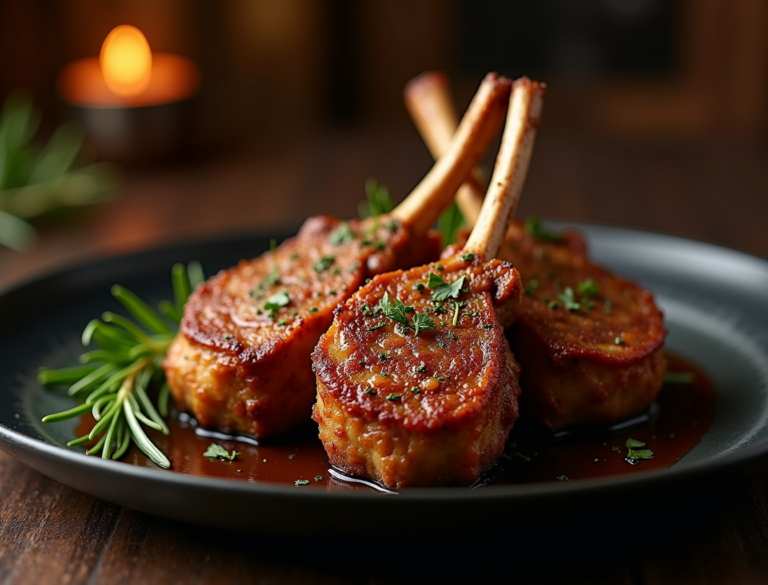
- Rest the ribs under loose foil for 5–10 minutes, then slice between each bone with a sharp knife. Serve with extra BBQ sauce on the side.
Notes
Remove the membrane. The thin papery layer on the bone side is chewy and blocks the rub — don’t skip this step.
The foil tent is essential. Trapping steam in Stage 1 starts breaking down collagen for tender ribs. Without it, ribs will be cooked but not fall-off-bone.
Double-baste the sauce. Two thin coats caramelize better than one thick coat, which burns.
Use the bend test. Pick up a section with tongs in the middle — if the rack bends easily and the surface starts to crack, they’re ready. Stiff ribs need more time at 300°F.
Not tender enough? Add 10–15 more minutes in Stage 1 at 300°F with the foil on before moving to Stage 2.
What You Need (Serves 2–3)
Baby back ribs are smaller and more tender than spare ribs, and they fit better in most air fryers. One full rack (about 2 lbs) is usually needed for 2–3 people. You’ll likely need to cut it in half or thirds to fit.
- 1 rack baby back ribs (about 2–2.5 lbs)
- ¾ cup BBQ sauce (your favorite, or homemade)
Dry rub:
- 2 tablespoons brown sugar
- 1 tablespoon paprika (smoked is best)
- 1 teaspoon garlic powder
- 1 teaspoon onion powder
- 1 teaspoon chili powder
- ½ teaspoon cumin
- ½ teaspoon salt
- ½ teaspoon black pepper
- ¼ teaspoon cayenne (optional)
Prepping the Ribs
Remove the membrane from the bone side of the rack — this thin, papery layer is chewy and prevents the rub from penetrating. Use a butter knife to loosen one end, grab it with a paper towel (for grip), and pull it off in one piece.
Cut the rack into sections that will fit your air fryer. Most 5.8-quart baskets need the rack cut into 3–4 pieces. This is fine — it doesn’t affect flavor.
Mix all the dry rub ingredients and coat every surface of every rib section. Press the rub in firmly. If time allows, let the rubbed ribs rest in the fridge for 1–4 hours (or overnight). This deepens the flavor significantly.
The Two-Stage Cooking Method
Stage 1 — Low and slow (relatively): Preheat to 300°F. Place rib sections bone-side up in the basket. Wrap the entire basket loosely with foil (or use a foil tent over the ribs) — this traps steam and tenderness the ribs. Cook for 25 minutes.
Stage 2 — High heat with sauce: Remove the foil. Flip the ribs so the meaty side faces up. Increase temperature to 380°F. Brush a generous coat of BBQ sauce over the tops. Cook for 10 minutes. Brush with more sauce, cook another 5 minutes. The sauce should be caramelized and sticky.
Total cook time: approximately 40 minutes. Internal temperature of the meat (taken between the bones) should be at least 190–200°F for fall-off-bone tenderness (the collagen needs to break down, which happens above 190°F).
Testing for Doneness
Temperature alone doesn’t tell the whole story with ribs. The bend test: pick up a section of ribs with tongs in the middle. If the rack bends easily and the surface starts to crack, they’re tender. Stiff ribs that don’t bend need more time. This is the same test pitmasters use.
Serving the Ribs
Slice between each bone with a sharp knife. Serve with extra BBQ sauce on the side and classic accompaniments:
- Coleslaw (the cool crunch is essential contrast)
- Corn on the cob
- Baked beans
- Air-fried potato wedges or fries
- Biscuits or cornbread
Tips for Tender Air Fryer Ribs
- Remove the membrane. This is non-negotiable. It creates a rubbery barrier that no amount of cooking will tenderize.
- The foil tent matters. The steam created under the foil in Stage 1 is what starts breaking down the collagen. Without it, the ribs will be cooked but not fall-off-bone tender.
- Don’t skip the double sauce baste. Two thin coats of sauce caramelize better than one thick coat, which burns.
- Let them rest. 5–10 minutes under loose foil after cooking allows the juices to settle before slicing.
Frequently Asked Questions
Can I use spare ribs instead of baby back?
Yes, but they’re meatier and thicker, so add 10–15 minutes to Stage 1. The method is the same.
Why aren’t my ribs tender?
They need more time at the lower temperature phase (Stage 1). Add 10–15 more minutes at 300°F with the foil on before moving to Stage 2.
Can I start with frozen ribs?
Thaw first. Frozen ribs cook unevenly. Thaw overnight in the fridge — don’t try to cook from frozen for a recipe that depends on tender, evenly cooked meat.
Do I need to pre-season overnight?
No — even 30 minutes makes a difference. Overnight is better for depth of flavor. If you have no time at all, the rub applied right before cooking still produces great results.
Can I make these for a larger crowd?
Cook in batches. Two racks made back-to-back work well — keep the first batch warm in a 200°F oven while the second finishes.